cPanel is a popular web hosting control panel used for managing websites and hosting accounts. cPanel is most often provided by shared hosting companies like Hostgator and BlueHost.
In this post, I will show you how to upload files to your website or edit htaccess file using cPanel’s “file manager”
What is cPanel?
In essence, cPanel simplifies the file management tasks, making it easier for individuals, especially those with limited technical expertise, to edit or upload the htaccess file (click here to read more about htaccess).
It’s widely used because of its user-friendly, graphical interface and robust set of features. Here’s a rundown of what cPanel offers:
- Website Management: cPanel provides tools to manage your websites, like File Manager for accessing and editing files, and FTP (File Transfer Protocol) accounts for uploading files.
- Domain Management: You can add and manage domains and subdomains, configure DNS settings, and set up redirects.
- Email Management: cPanel allows you to create and manage email accounts associated with your domains, set up email forwarders, and configure spam filters.
- Database Management: It supports database creation and management, typically with MySQL, allowing you to manage databases, users, and permissions.
- Security Features: Includes options for password protecting directories, managing SSL/TLS certificates, and configuring firewalls.
- Software Installations: With tools like Softaculous or Fantastico, you can easily install various web applications like WordPress, Joomla, or Drupal.
- Server and Site Monitoring: You can view statistics about your website’s performance and server resources, such as bandwidth and disk space usage.
- Backup and Restore: cPanel provides options to backup and restore your website data.
- User-Friendly Interface: Its graphical interface makes it easier for users without deep technical knowledge to manage web hosting aspects.
If You Need a Solid Web Host
| If You Are Looking for a Web Hosting |
|---|
| I personally have been using MDD Hosting for over 10 years. They are a small hosting company with excellent reliability and awesome support. Something that you will not find at super large hosting companies. Give MDD Hosting a try, you won’t regret it! |
Step-by-Step Guide to Uploading Files
Step 1: Browse to your web hosting account
First, using your favorite web browser, head over to the web host’s account page. Log in to your account and you will find yourself at the cPanel screen.
What you will see depends on cPanel version and your web host’s desire to turn on or off certain features. But for the most part, you should see things like Files, Domains, Redirects, Backup Wizard, WordPress Manager by Softaculous, etc.

Step 2: The File Manager – Your Trusty Sidekick
Once inside, seek the “File Manager” icon. It’s your trusty sidekick in this quest. Click on it.
Step 3: Choosing Your Battlefield
Now, the question arises: Where to upload? If you want to upload your htaccess file, the “public_html” folder is where the action is for your main site. If you have subdomains or add-ons, they’ll have their own named folders.
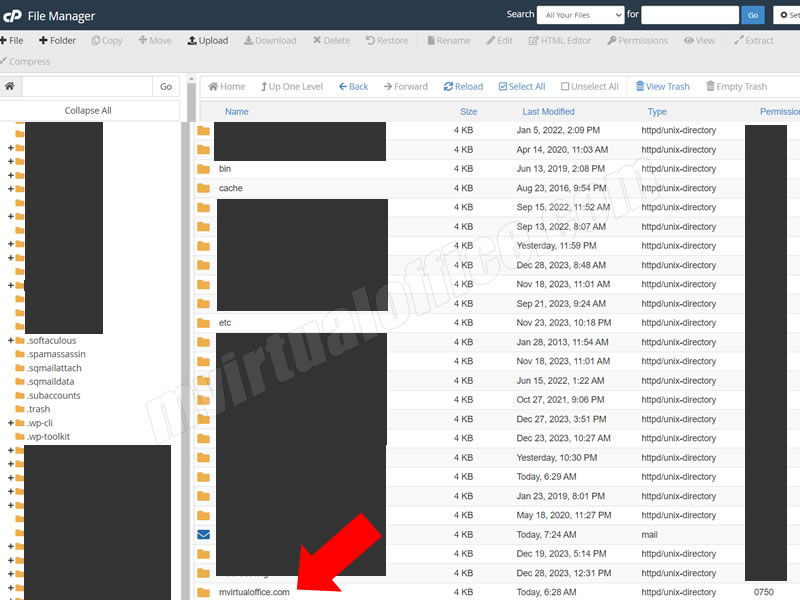
For example, I have a bunch of other test sites under my hosting account, in addition to mvirtualoffice.com (hence the blocked out sections in the above image). You need to click on the manila file folder next to the domain name to further drill down into that directory.
Step 4: Uploading – The Main Event
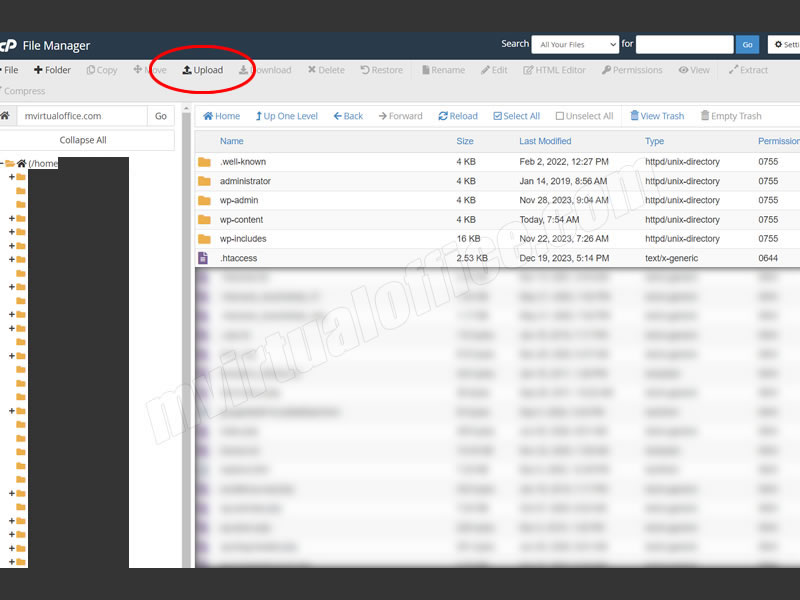
Here comes the main event: uploading files. Look for the “Upload” button, usually residing at the top of the page. Click it, and a new tab opens, beckoning you to drag and drop files or select them manually.
Step 5: The File Transfer Dance
As you select files, watch them dance into the cPanel realm. A progress bar keeps you company, narrating the tale of each file’s journey. Once the bar hits 100%, your files have successfully teleported to their new home.
Step 6: File Editing
Let’s say you want to edit your htaccess file. You can either download the file, edit it within your laptop/desktop, and re-upload it or you can just make the changes within cPanel.
You can use the steps previously outlined above when using the first editing method.

If you want to edit the file in place, follow these steps:
- Step A: Locate the htaccess file and double click on either the purple folder OR the name to save the file to your local computer
- Step B: Make sure that htaccess file is highlighted, then click on the EDIT icon (just below the cPanel ribbon) to edit the file
- Step C: Edit and save the file
The “Gotchas” – Beware of These Sneaky Traps!
- File Size Limit: There’s a cap on how much your files can weigh. If your files are too plump, consider breaking them into smaller bites or increase the limit via PHP settings – a tale for another day.
- File Types: cPanel, like a picky eater, may refuse certain file types. If so, tweak the settings or zip them up to disguise their true form.
- Overwriting Files: Uploading a file with a name that already exists is like challenging it to a duel. The new file wins, erasing the old one. So, double-check file names unless you seek an unexpected vanishing act.
Final Thoughts
There you have it, intrepid explorers! Uploading files in cPanel is like a mix of alchemy and a treasure hunt. Embrace the adventure, and remember: every click, drag, and drop adds a stroke to the masterpiece that is your digital presence.
Reference Links
Tags: cpanel