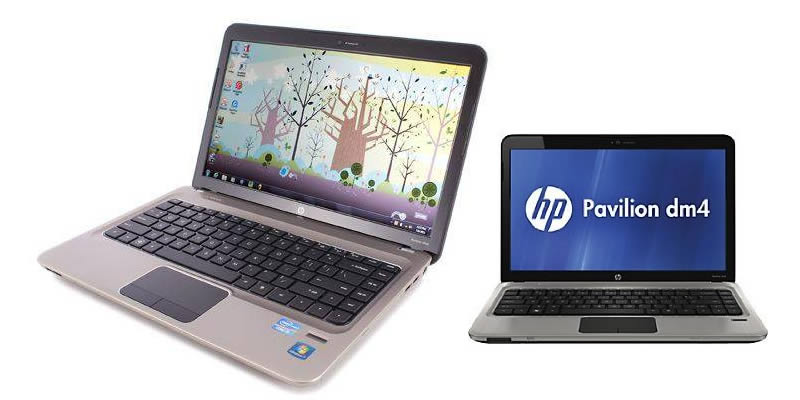
I have been running Windows 7 on this solid little machine since 2011.
Since Windows 7 is no longer being updated (at least to general public) as of January 2020, I thought it was time to see if I can upgrade to Windows 10. If I failed, my backup plan was to install Ubuntu Linux OS.
Now, HP is pretty adamant about not providing any support whatsoever if you decide to take on this endeavor (probably hoping that you would just pay for a new laptop) so I will outline the steps I took to install Windows 10 on my Hp DM4-2191us laptop.
I thought it would be a nightmare trying to find replacement drivers, etc., but to my surprise, the installation went without a hitch except for one driver.
BTW< with Windows 10 + SSD drive, my machine is absolutely blazing with general office applications.
Machine Specifications
- Model#: HP DM4-2191us
- Build#: QE382UA#ABA
- CPU: Intel Core i5-2430M (2nd gen), 2.4GHz
- Memory: 8GB
- Network: Wireless LAN – Atheros
- TPM: Fingerprint sensor
* please note that if your build# is slightly off, it may mean that your hardware configuration is different.
Hardware Upgrade Suggestions
Before upgrading the OS, I highly suggest you perform both hardware upgrades if not already done.
Memory

HP Pavilion dm4-2191us laptop takes two, PC3-12800, 204-pin SODIMM memory modules (a.k.a. DDR3L-1600 SODIMM).
If you currently only have one 4GB installed, you should purchase the second 4GB module so that you will have 8GB of memory.
When it comes to adding memory, some say it’s important to match the manufacturer and manufacturing date for maximum performance but this is really meant for a serious gamers (which you wouldn’t be if you are using this HP dm4-2191us laptop).
So I am going to provide you with two solid suggestions from Crucial:
- Crucial 8GB kit (2x4GB) DDR3L-1600, CT2KIT51264BF160B for less than 50 bucks
- Crucial 4GB (1x4GB) DDR3L-1600, CT51264BF160B for around 20 bucks
Storage Disk Drive

The original laptop came with 5400RPM hard disk (a.k.a. mechanical spinning disk). Because Windows 10 demands more from hardware, and since dm4-2191us hardware is almost 10 years old, it would be REALLY beneficial to replace this mechanical drive with an SSD.
Prices for SSDs have come down quite a bit but there is a large price disparity between brands with perceived and real quality difference.
If you want a rock solid, reliable drive that you will use for years, I would recommend Samsung 860 EVO models but you will pay more.
On the other hand, if you want something that is reliable that you plan on using it for 3-4 years, there is nothing wrong with Kingston or ADATA.
Lastly, there is about $20 dollar difference between 240gb vs 480gb capacity so if you plan on storing lots of pictures or songs, go with the larger SSD:
- $35 bucks, Kingston 240GB A400 SA400S37 SSD
- $53 bucks, Kingston 480GB A400 SA400S37
- $80 bucks, Samsung 860 EVO 500GB – MZ-76E500B/AM
Windows 10 OS
As of this writing, Microsoft’s official “free offer” to upgrade from Windows 7 to Windows 10 has long ended (back in 2016) so does that mean you have to pay $100 to Microsoft?
Thankfully no.
Gordon Kelly from Forbes.com did an excellent write up so go to his article, How To Upgrade To Windows 10 For ‘Free’ In 2020 .
Please DO NOT upgrade the OS yet. Wait for the installation step below.
Required Tools
Much like all other laptops, HP DM4-2191us laptop uses very small Phillips screws that are easy to strip. Make sure to use correct Phillips screwdriver tips to ensure that you don’t strip any heads.
If you do not have such screwdrivers, you can buy something that is inexpensive like this Oria Precision screwdriver kit that comes with 60 bits or the larger version with 126 bits.
I have a similar 60 piece kit version because I prefer the hard clam shell storage case.
Installation Steps
Remember that static electricity is your enemy! Make sure to ground yourself by touching metal objects before disassembling your laptop.
- Step #1 – lay down a small cotton towel on the work surface and flip over your laptop over so the under side is facing you (towel is to prevent scratching on the cover)
- Step #2 – Using your finger, slide the battery lock and remove the battery
- Step #3 – Once the battery has been removed, you will see two Phillips screws. Remove them carefully and set them aside
- Step #4 – there are three plastic tabs holding down the cover; gently pry up the cover from the screw tab side to disengage these tabs
- Step #5 – With the cover removed, you now have access to the memory slots; add SODIMM memory if desired (the module can fit only one way; make sure to align the nootch)
- Step #6 – If you are going to upgrade the hard drive, you need to remove the second access panel; with the first cover off, remove two screws holding down the hard drive cover
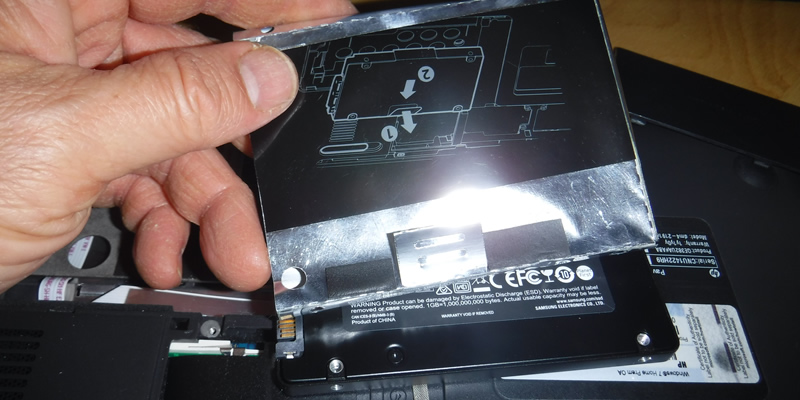
- Step #7 – your original hard drive may be encased in a foil-like enclosure; gently pry off the drive from the laptop
- Step #8 – The primary purpose of the foil enclosure is to cool the hard drive; because SSD drives tend to be skinnier than regular hard drives, this enclosure will trap the heat instead of dissipating heat (a.k.a. do not re-use this enclosure)
- Step #9 – attach your new SSD to the hard drive cable from the laptop
- Step #10 – re-install both covers and battery
- Step #11 – I prefer to do a fresh install vs upgrade to ensure old drivers will not cause problems so insert your installation disk and follow the instructions on the screen
- Step #12 – The process took about 35 minutes to complete
- Step #13 – Once the OS has been installed, go to Device Manager and confirm that there is one entry under “UNKNOWN DEVICE” with hardware ID ACPI/hpq004; this is due to the fact that Windows 10 is not recognizing 3D drive guard chip (i.e. fall sensor or accelerometer hardware which automatically parks the head in a hard disk; though this is no longer applicable in an SSD drive, I still don’t like having unknown device error messages so we will resolve it; BTW, ACPI is short for Advanced Configuration and Power Interface created by Intel, Microsoft and Toshiba back since Windows 98. ACPI is a power management program to turn off power to components not being used
- Step #14 – Please note that there are three variations of the 3D drive guard. HPQ0004 chip was sold in 2005-2011, HPQ6000 was sold in 2011-2013 and HPQ6007 was sold from 2013 until 2016
- Step #15 – There are specific drivers for each of these sensor chips.
- Step #16 – Drivers for chips HPQ0004 an HPQ6000 were written for Windows 7 and Windows 8; HPQ6007 driver was written to include Windows 10
- Step #17 – To make the long story short, even though I had HPQ0004 chip, I installed the driver for HPQ6000 which made the error message go away
I hope this article was useful. After all, we need to do our share of re-using rather than buying new!
Kevin
Reference Links
- HP Customer Support Knowledge Base: HP Pavilion dm4-2191us Entertainment Notebook PC Product Specifications (external link click here)
- HP Customer Support Knowledge Base: Windows 7 64-bit drivers (external link click here)
- HP Customer Support Knowledge Base: Windows 8 64-bit drivers (external link click here)
- HP 3d Drive Guard – forum info (external link click here)
- Forbes.com – How To Upgrade To Windows 10 For ‘Free’ In 2020
- Microsoft.com – Reactivating Windows 10 after a hardware change


